
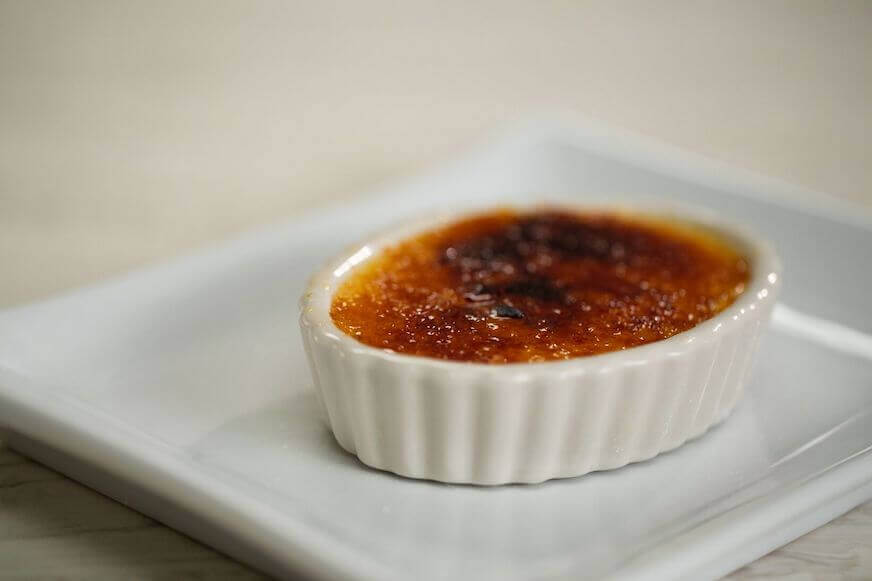
How to Make the Perfect Crème Brûlée

With a crackly, sugary crust and a creamy interior, crème brûlée is an impressive dessert for any occasion. Whether you’re looking for a treat for a dinner party or want to make a night in a little extra special, a decadent crème brûlée will do the trick. Crème brûlée consists of a cream-based custard that is traditionally flavored with vanilla. The top of the custard is sprinkled with sugar, which is then caramelized using high heat.
Despite this classic dessert’s elegant appearance, it only requires five ingredients to make! The key to knowing how to make a perfect crème brûlée is learning how to properly combine and treat these ingredients.
The History of Crème Brûlée
Since this dish’s name means “burnt cream” in French, it’s easy to assume the dish originated in France. However, numerous European countries lay claim to the crème brûlée, including France, England, and Spain.
Some stories say the dish originated in the 17th century at Trinity College in Cambridge, England. Legend has it that students took an ordinary custard and then attempted to burn the school’s crest into a sugary topping. This story explains why crème brûlée is also known as a “trinity creme.”
However, the first written recipe for crème brûlée appeared in 1691 in Le Cuisinier Royal et Bourgeois by François Massialot. This version described a crème brûlée that is very similar to the dessert we enjoy today.
How to Make Crème Brûlée
Gather Your Ingredients
Before you begin cooking, gather your ingredients and organize your workstation. By practicing mise en place—measuring your ingredients and compiling all necessary tools ahead of time—you’ll be better prepared to cook with optimal efficiency. This dish is often made and served in individual ramekins, so make sure to lay these out before you begin cooking.
Ingredients
- 5 egg yolks
- 2 cups heavy cream
- 1 cup sugar, divided
- ⅛ teaspoon salt
- 1 vanilla bean
Make the Custard
Now it’s time to start cooking. Pour your heavy cream, vanilla bean, and salt into a saucepan over low heat. If you’re using extract instead of vanilla bean, hold off on adding it right away. Warm up the mixture just until it’s hot, remove from heat, and let sit for a few minutes. Once the mixture has cooled slightly, you can discard the vanilla bean or add the vanilla extract.
After the cream mixture is ready, it’s time to work on the eggs. Begin by separating your eggs, and then place the egg yolks in a large bowl with ½ cup of sugar. Beat this mixture until it is light in color.
Next, temper the mixture. Slowly pour about a quarter of your warm cream mixture into the yolks while stirring. Once the eggs are tempered, pour the egg mixture into the remainder of the warm cream and stir until you have a smooth mixture.
After your mixture is ready, put a kettle of water on the stove to boil.

Now that the custard mixture is ready, it’s time to divide it evenly between four six-ounce ramekins. Before you begin filling, place your ramekins on a baking sheet or roasting pan with sides that are at least half an inch tall.
After you’ve filled the ramekins, fill the roasting pan or baking sheet with the boiling water from the kettle. The waterline should reach halfway up the sides of your ramekins. Carefully place the tray in your heated oven–try not to splash water into the ramekins!
Bake for 30 to 40 minutes until the custard has set–it should still jiggle when you shake the pans, but should no longer be a liquid.
Once the water has cooled, remove the ramekins from the pan, cover with plastic wrap, and place them in the refrigerator.
Create a Sugary, Brittle Top
Before you make that crunchy top, your custards will need to cool completely. They should be cool enough after about two hours in the refrigerator, but you can keep them in the fridge for up to three days, which makes them an excellent make-ahead dessert that’ll surely impress your friends.

Once you’re ready to finish up your crème brûlée, it’s time for the tricky part: the crunchy top. Remember, crème brûlée is French for “burnt cream,” so this part is essential. Sprinkle a thin layer of sugar evenly atop each custard. About a teaspoon should be enough, depending on the size of your ramekins.
Now it’s time to create the dish’s iconic caramelized sugar layer. One way to caramelize the sugar is by using a torch. If you choose this method, turn the torch on and hold it a few inches above the ramekin. Continually move the flame so the sugar evenly melts.
If you don’t have a torch, you can use the broiler in your oven. Turn the broiler on high then place your ramekins on a baking sheet. Set a baking rack near the top of the oven, then place the ramekins so they are only a few inches below the broiler. The sugar will take about five minutes to caramelize, but keep a close eye to prevent burnt sugar.
Perfect Your Plating
Once your crème brûlée is complete, you can present it beautifully with some plating techniques. Plating requires some detail work, with attention to the elements of texture, color, and layering.
For a gorgeously-plated crème brûlée dessert, consider adding fruit like raspberries or blackberries. Just a couple of berries atop the dessert can add an extra bit of sweetness as well as a pop of color. A mint leaf–in addition to the fruit or on its own–can have the same effect.
For the finishing touches, you may opt to add a few chunks of chocolate or sprinkle cacao nibs atop your dessert, and of course, a dollop of whipped cream is always an excellent option as well.
Culinary & Pastry Career Survey
Culinary & Pastry Career Survey
What's your ideal culinary career? Answer 20 simple questions and see if your dream career gets revealed to you.
We’ve compiled of all of the essential questions into one handy guide: Career options, description of skill requirements, and more!
Crème Brûlée vs. Crema Catalana
The beloved Spanish dessert crema Catalana is almost visually identical to creme brulee. However, the Spanish version is made with milk rather than cream and often includes flavoring such as lemon and cinnamon.
Continue to Practice New Dishes
With crème brûlée checked off your culinary bucket list, you can set your sights on perfecting new dishes. Whether you’re interested in making a ribboned chocolate babka or recreating your favorite Thai dishes, online cooking classes may help.
“School can teach you each ingredient’s function and the science and chemistry so that you understand what’s happening. And when something does go wrong, you can recognize it and prevent that from happening in the future.”*
Anne Lanute, Escoffier Executive Chef
America’s Test Kitchen and Auguste Escoffier School of Culinary Arts Home Gourmet teamed up to bring you Home Gourmet cooking classes. All of the courses are taught by talented expert instructors, who are available to answer your questions.
If you find that you love creating sweet dishes like crème brûlée, you may even want to consider pastry school. Escoffier offers both in-person and online baking and pastry professional programs for when you’re ready to take that next step.
To learn more about creating in the kitchen, check out these next:
- How to Make Sauce Tomat
- How to Make Petit Fours: A Brief History & Recipes
- How to Brew Your Own Soda
This article was originally published on December 18, 2017, and has since been updated.
*Information may not reflect every student’s experience. Results and outcomes may be based on several factors, such as geographical region or previous experience.