
A Beginner’s Guide to Cake Decorating (with Infographic)
If there are lots of celebrations in your future, it can be both a money-saver and a fun hobby to learn how to decorate cakes!
While fancy flowers and pretty piping may seem intimidating, you can actually get started with just a few specialty tools and a couple of basic techniques. Decorating cakes can be as simple or as complicated as you choose to make it!
Whether you’re baking a cake for a family birthday, or cooking along with your favorite baking competition on TV, here are some tips to get you started with cake decorations.
Start with the Right Tools
With just a few tools, you can get started on your cake decorating journey. In fact, you may already have a few of these items lying around the kitchen.
A cake turntable is a raised stand that rotates 360-degrees. This will let you spin the cake so the right side is always facing you. If you don’t have one, a Lazy Susan can also work in a pinch. But the extra height from the turntable lets you stand up straighter, which can make decorating easier on your back.
You’ll need a serrated knife to “level” your cake. Most cakes come out of the oven with a slight dome at the top, so you need to cut that extra height off for a nice flat surface. You’ll also want an offset spatula. This will let you keep your fingers back from the frosting, so you won’t accidentally ruin the finish. You may have both of these items at home already — many home chefs do!
For specialty tools, a cake scraper is handy for creating a smooth finish with your frosting. This simple tool is just a flat piece of metal that you can hold against your cake while rotating it on the turntable. They usually have one straight side and one patterned side for textured designs.
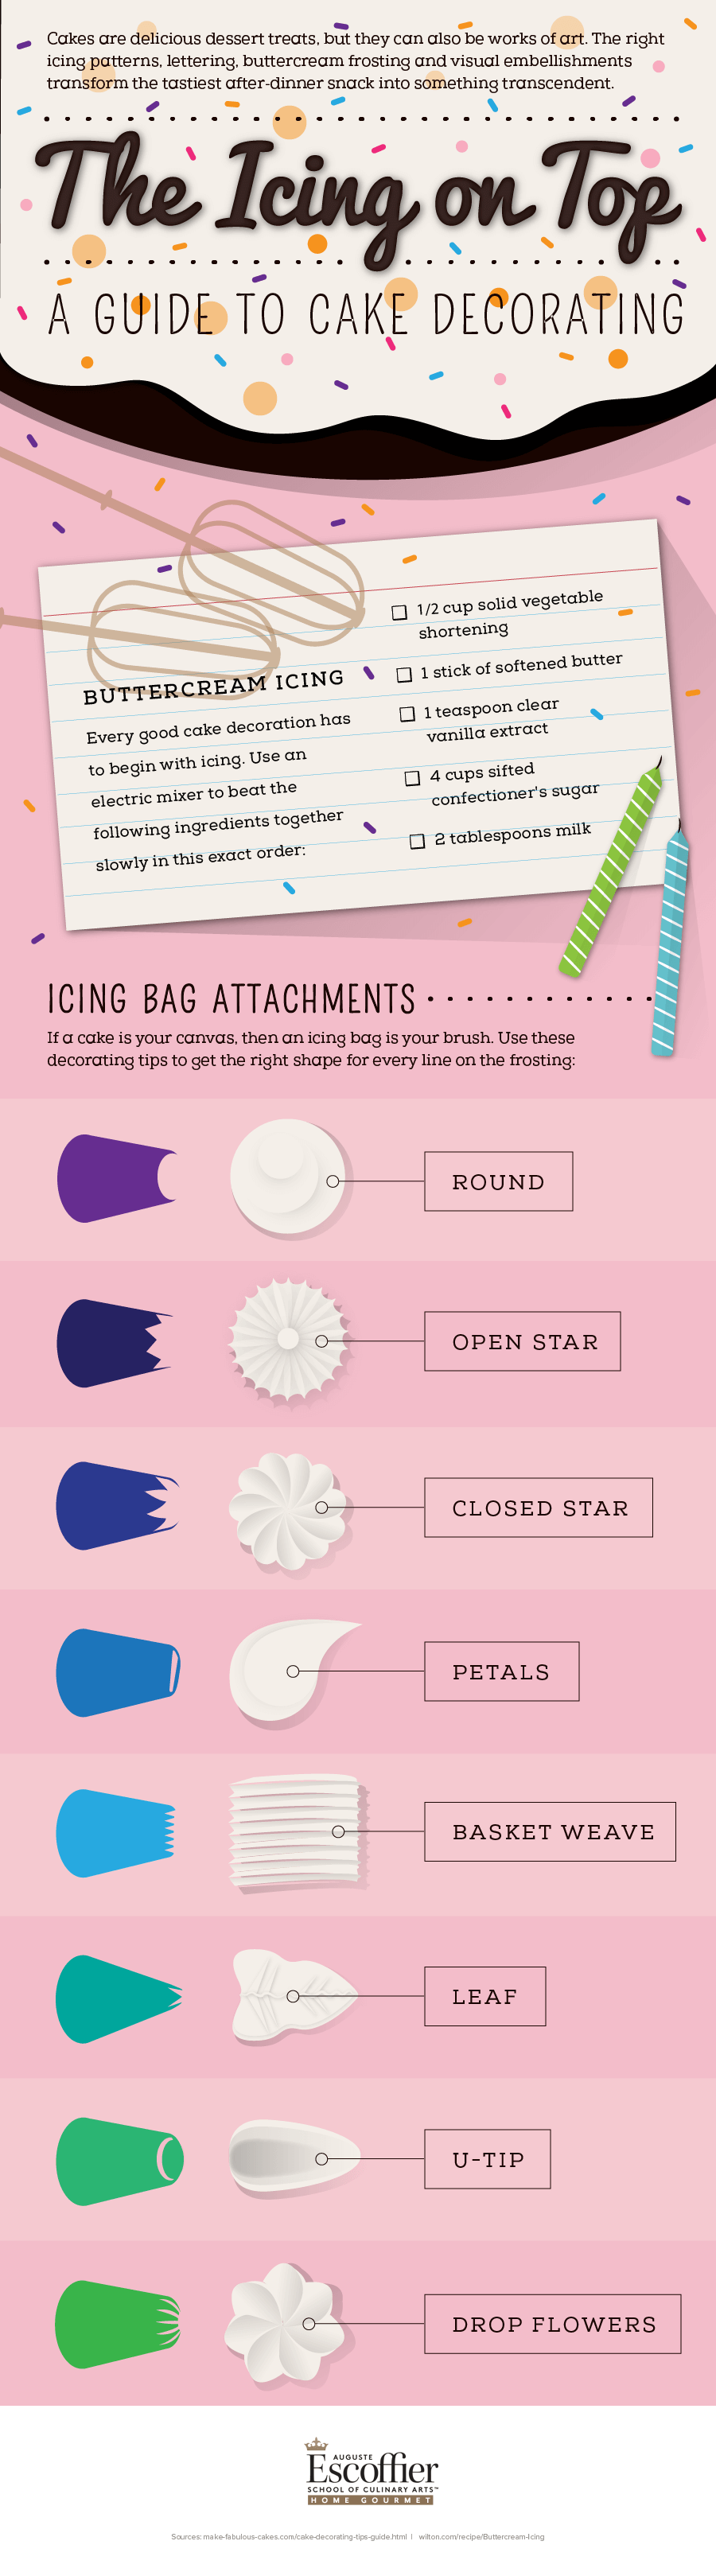
Finally, every new cake decorator will need pastry bags and tips. There is a wide variety of tips that let you pipe your icing into words, flowers, dots, basket weave patterns, and more.
Culinary & Pastry Career Survey
Culinary & Pastry Career Survey
What's your ideal culinary career? Answer 20 simple questions and see if your dream career gets revealed to you.
We’ve compiled of all of the essential questions into one handy guide: Career options, description of skill requirements, and more!
Freeze!
The cake, that is.
After you have cooked your cake, a short freeze will make the layers easier to level and frost. Frozen cakes are less crumbly, meaning it’s easier to get them flat and to keep your frosting lump-free.
To level your cake, place it on the turntable. Hold your serrated knife straight out in front of you, with your elbow tucked into your side. Place the knife against the edge of your cake and rotate the turntable slowly while holding the knife still. Just score the edge of the cake with the knife as you rotate it.
Once you have your shallow mark around the whole cake, repeat the process. This time, press the knife gently into the cake while you rotate it, letting the turntable do the work. When you’re done, you’ll have a perfectly flat cake for layering or decorating!
Use Homemade Frosting
If you want a smooth texture on your cake, you need to DIY the frosting. Canned frostings are thinner and don’t adhere to the cake as well. They can look lumpy and even slide off your cake!
Make your own buttercream instead. It’s simple, delicious, and you can add food coloring for custom colors. Here’s a recipe for simple vanilla buttercream:
- ½ cup solid vegetable shortening
- 1 stick softened butter
- 1 tsp clear vanilla extract
- 4 cups sifted confectioner’s sugar
- 2 Tbsp milk
Use an electric mixer to beat the ingredients together slowly, in the order they’re listed. That’s it! Add a few drops of food coloring if you’d like a colorful buttercream.
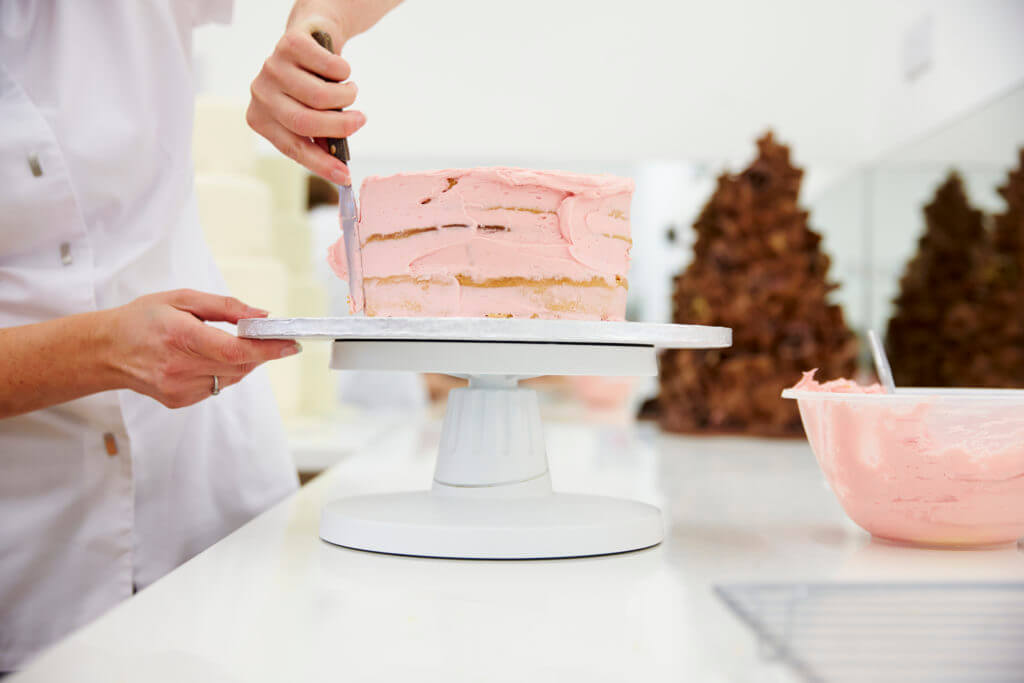
Now it’s time to frost. Apply a thin layer of buttercream frosting on the cake using your offset spatula. This is your “crumb coat,” and it will keep the crumbs tight against the cake instead of pulling them off into your finished frosting.
After applying the crumb coat, chill the cake for 15 to 30 minutes to let it set. Then, add a second layer of frosting with your offset spatula for your finish coat.
Plop a mound of buttercream onto the top of the cake. Smooth it out on the top, and draw the excess down the sides of the cake. For a super-smooth finish, use your cake scraper. Hold it flat against the cake while rotating it on the turntable. You may want to warm the scraper by dipping it into warm water before using. But make sure to dry it well before touching the metal to the cake!
Add Embellishments
A great deal of cake decorations come out of the pastry bag. With a little practice, this simple tool will let you create a wide variety of shapes and designs.
To get started, fold down the edges of the piping bag to keep them clean. Cut just the pointed tip off of the bag, and insert your metal piping tip. Push it down so the metal tip just extends out of the small hole you cut.
Now it’s time to fill the bag. You can either hold the bag in one hand and fill it with the other, or set the bag into an empty water glass to hold it upright while you fill it. Use a rubber spatula to add frosting to the bag. Then flip the folded edges back up and twist them together to create an airtight seal.
Ready to pipe!
If you’re planning to pipe a message, write it out on wax paper and trace it to get a feel for the motion. You can also practice dots, swags, and flowers on wax paper before moving to your cake.
For a simple — but impressive — rosette, use a star tip. Just squeeze the bag and lift straight up to make the star. Then make a circle around the star, squeezing gently the whole time.
Watch cake decorating techniques by Escoffier Chef Instructor Susie, who brings over 30 years of pastry & baking experience. She will demonstrate the proper way to ice a cake and show various buttercream piping techniques.
Practice Makes Perfect
Don’t be discouraged if your first few attempts don’t turn out perfectly. They’ll still taste delicious!
Be warned — once you start to make beautiful cakes, all your friends and family will want one for their birthdays and parties!
Home bakers can learn more about Classic Cakes or Classic Foam Cakes with online classes from Escoffier Home Gourmet and America’s Test Kitchen. Or try a new career with a degree or diploma in Baking & Pastry Arts from Auguste Escoffier School of Culinary Arts!
Did you find that article helpful? Here are a few more to try:
- An Introduction to the 5 French Mother Sauces
- 4 Tips to Become an Artist in Plating
- 6 Types of Culinary & Pastry Careers in the Food Service Industry
This article was originally published on March 18, 2015, and has since been updated.